티스토리 뷰
https://github.com/weniv/phaser_youtube
GitHub - weniv/phaser_youtube: 유튜브 공개용 코드
유튜브 공개용 코드. Contribute to weniv/phaser_youtube development by creating an account on GitHub.
github.com
- git을 이용해 위 github의 소스코드를 clone 했다.
- 어차피 무료 공개 강의 범위내에 있는 사이트라 공유한다.
- git 설치 후 vscode에서 터미널을 열어 아래 명령어를 차례대로 입력하자
git init  -->  먼저 local repository를 만들어줘야한다.
git clone https://github.com/weniv/phaser_youtube.git
- 소스를 받으면 아래와 같은 구조로 이루어져 있는데 체크한 start 폴더를 vscode로 open folder하면 된다.
- start가 phaser에서 제공하는 기본 템플릿이다.

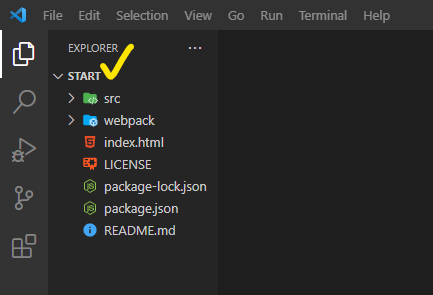
- 터미널을 열어 아래의 명렁어를 차례대로 입력하자
- 입력 후 아래의 사진이 나오면 잘 된거다.
npm install  -->  node 모듈 설치
npm start
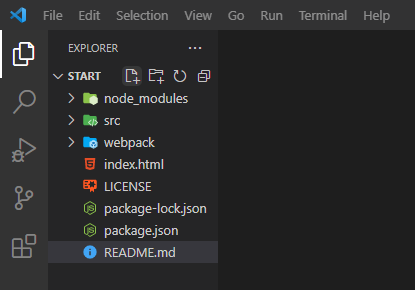
● 실습
1. src/index.js 파일에 console.log를 추가해 찍어보자
import Phaser from 'phaser';
import logoImg from './assets/logo.png';

class MyGame extends Phaser.Scene {
    constructor () {
        super();
    }

    preload () {
        this.load.image('logo', logoImg);
    }

    create () {
        console.log('create');
        const logo = this.add.image(400, 150, 'logo');

        this.tweens.add({
            targets: logo,
            y: 450,
            duration: 2000,
            ease: "Power2",
            yoyo: true,
            loop: -1
        });
    }

    update() { // 화면이 update 될 때마다 실행
        console.log('update');
    }
}

const config = {
    type: Phaser.AUTO,
    parent: 'phaser-example',
    width: 800,
    height: 600,
    scene: MyGame
};

const game = new Phaser.Game(config);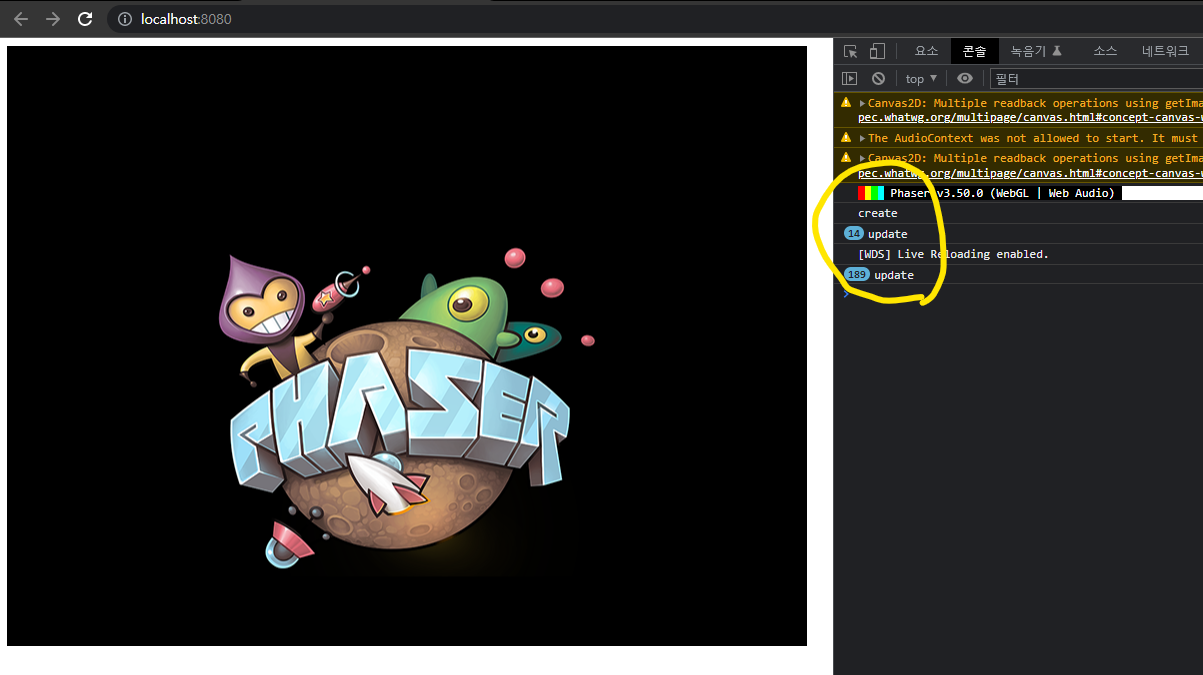
- create function이 먼저 실행된 후 update function이 계속 실행되는 것을 확인할 수 있다.
2. src/assets 경로에 있는 background 이미지를 화면에 load 해보자
import Phaser from 'phaser';
import bgImg1 from './assets/background.png';
import playerImg from './assets/player.png';

class MyGame extends Phaser.Scene {
    constructor () {
        super();
    }

    preload () {
        this.load.image('background1', bgImg1);
        this.load.image('player', playerImg);
    }

    create () {
        this.backgroundimg = this.add.image(0,0, 'background1'); // (x축, y축)
    }

    update() { // 화면이 update 될 때마다 실행
        // console.log('update');
    }
}

const config = {
    type: Phaser.AUTO,
    parent: 'phaser-example',
    width: 800,
    height: 600,
    scene: MyGame
};

const game = new Phaser.Game(config);
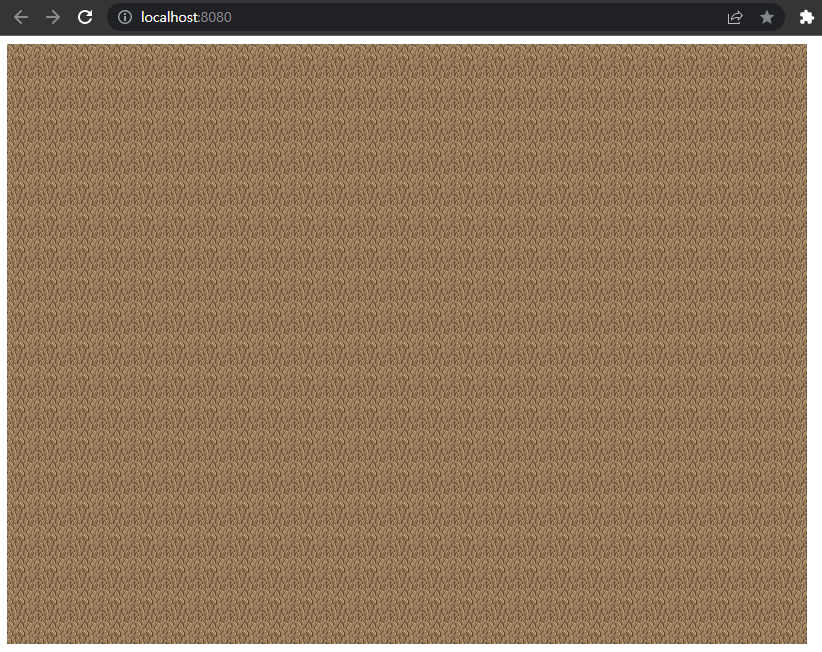
- 위와 같이 코드 수정 후 실행을 하면 아래와 같은 배경화면이 되버린다.

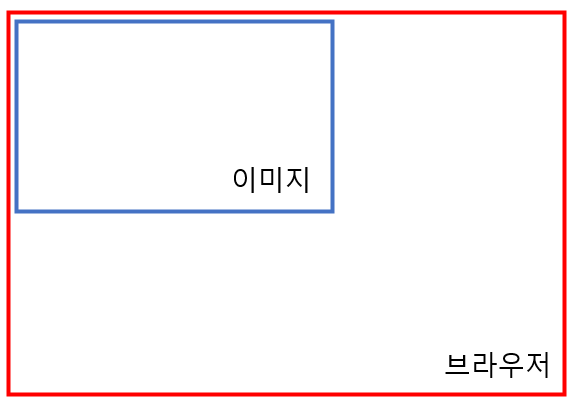
this.backgroundimg = this.add.image(0,0, 'background1'); // (x축, y축)- 위의 코드는 배경 이미지의 중앙을 브라우저 기준으로 (0, 0)의 좌표에 놓는다는 의미이다.
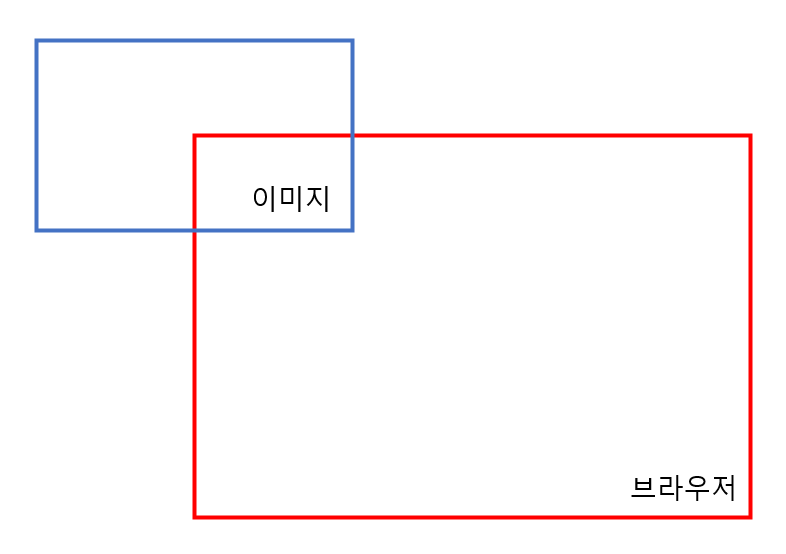
- 따라서 아래의 코드를 추가해줘야 한다.
this.backgroundimg = this.add.image(0,0, 'background1'); // (x축, y축)
this.backgroundimg.setOrigin(0, 0);
- 이미지를 아래와 같이 브라우저와 동일한 (0, 0)에 위치시킨다는 의미이다.
- 물론 이미지를 (0,0)에 맞춰도 브라우저 자체의 사이즈를 늘려버리면 아래와 같이 된다.
const config = {
    type: Phaser.AUTO,
    parent: 'phaser-example',
    width: 1600, // 가로 2배로 확대
    height: 1200, // 세로 2배로 확대
    scene: MyGame
};
3. src/assets 경로에 있는 player 이미지를 화면에 load 해보자

- 당연히 위의 캐릭터 이미지 전부를 통째로 load 할 수는 없다.
- 하나씩 자른 후 load 해야한다.
create () {
    this.backgroundimg = this.add.image(0,0, 'background1'); // (x축, y축)
    // 아래와 같이 안할 경우 load 되는 이미지의 중심점으로 잡아 1/4 크기가 된다.
    this.backgroundimg.setOrigin(0, 0);

    this.lion = this.add.image(100, 100, 'player');
}
- 그러면 위의 캐릭터를 어떻게 정중앙에 위치시킬까?
- 현재 게임 화면의 전체 넓이는 config 변수가 가지고 있다. 따라서 이것을 이용하면 된다.
create () {
    this.backgroundimg = this.add.image(0,0, 'background1'); // (x축, y축)
    // 아래와 같이 안할 경우 load 되는 이미지의 중심점으로 잡아 1/4 크기가 된다.
    this.backgroundimg.setOrigin(0, 0);

    this.lion = this.add.image(config.width / 2, config.height / 2, 'player');
    this.lion.setOrigin(0, 0);
}

    const config = {
    type: Phaser.AUTO,
    parent: 'phaser-example',
    width: 800,
    height: 600,
    scene: MyGame
};
- 위와 같이 하면 중앙은 맞긴 맞는데... 왼쪽 상단의 모서리가 중앙에 위치된다.

- 이것은 lion 변수에도 setOrigin 값을 넣어줬기 때문이다.
- 배경 이미지는 setOrigin을 이용해 왼쪽 상단을 중심점으로 잡아야하고 캐릭터는 setOrigin을 설정하지 않아 중앙으로 오도록 하는 것이다.
create () {
    this.backgroundimg = this.add.image(0,0, 'background1'); // (x축, y축)
    // 아래와 같이 안할 경우 load 되는 이미지의 중심점으로 잡아 1/4 크기가 된다.
    this.backgroundimg.setOrigin(0, 0);

    this.lion = this.add.image(config.width / 2, config.height / 2, 'player');
    // this.lion.setOrigin(0, 0);
}

    const config = {
    type: Phaser.AUTO,
    parent: 'phaser-example',
    width: 800,
    height: 600,
    scene: MyGame
};
4. 캐릭터 이미지를 잘라서 움직이게 만들기
- 캐릭터 자르기
import Phaser from 'phaser';
// import logoImg from './assets/logo.png';
import bgImg1 from "./assets/background.png";
import playerImg from "./assets/player.png";

class MyGame extends Phaser.Scene {
    constructor () {
        super();
    }

    preload () {
        this.load.image("background1", bgImg1);

        // this.load.image("player", playerImg);
        this.load.spritesheet("player", playerImg, {
            frameWidth: 32,
            frameHeight: 36
        });
        // frameWidth: 32, frameHeight: 36이 캐릭터 하나의 크기이다.
        // frameWidth: 64로 지정하면 캐릭터 2개가 화면에 load 된다.
    }

    create () {
        // ============== 배경 ==============
        this.backgroundimg = this.add.image(0, 0, 'background1'); // (x축, y축)
        // 아래와 같이 안할 경우 load 되는 이미지의 중심점으로 잡아 1/4 크기가 된다.
        this.backgroundimg.setOrigin(0, 0);

        // ============== 캐릭터 ==============
        // this.load.image에서 this.load.spritesheet로 변경
        this.lion = this.add.sprite(config.width / 2, config.height / 2, 'player');

        // this.lion = this.add.image(config.width / 2, config.height / 2, 'player');
        // this.lion.setOrigin(0, 0); 캐릭터를 정중앙에 위치시켜야하므로 주석처리

        // 크기 1.5배로
        this.lion.scale = 1.5;

        // x축 방향 뒤집기
        // this.lion.flipX = true;

        // y축 방향 뒤집기
        // this.lion.flipY = true;

        // 기울기(이걸 update function에 두면 부드럽게 캐릭터 방향 전환 가능)
        // this.lion.angle += 10;

        // ============== 안내문구 ==============
        this.add.text(20, 20, "'위니브 월드 : 새로운 시대'에 오신 것을 환영합니다.", {
            font: '25px 배달의민족 주아 TTF',
            fill: '#f5e99f' // 16진수나 컬러이름
        });
    }

    update() { // 화면이 update 될 때마다 실행
        // console.log('update');
    }
}

const config = {
    type: Phaser.AUTO,
    parent: 'phaser-example',
    width: 800,
    height: 600,
    backgroundColor: 0x000000,
    physics: {
        default: 'arcade',
        arcade: {
            debug: process.env.DEBUG === "true" // debug 옵션 = true
        }
    },
    scene: MyGame
};

const game = new Phaser.Game(config);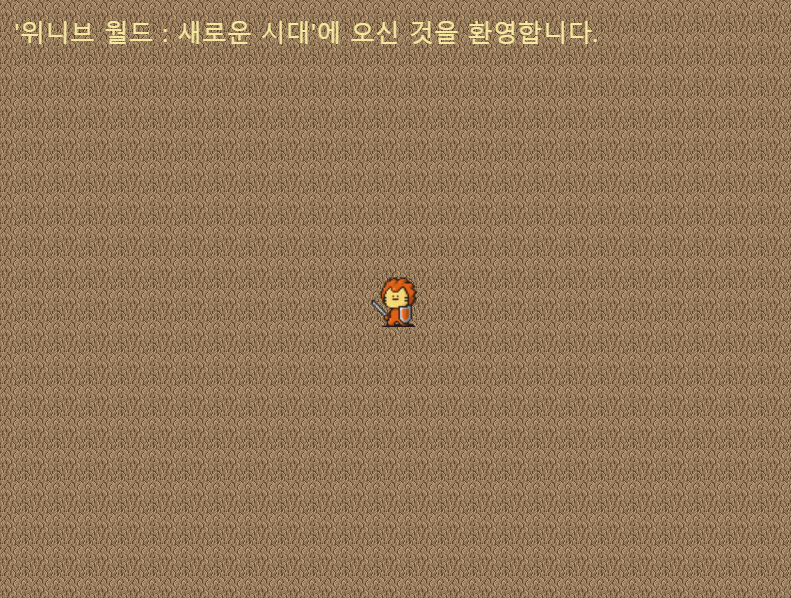
- 캐릭터 움직이기
import Phaser from 'phaser';
// import logoImg from './assets/logo.png';
import bgImg1 from "./assets/background.png";
import playerImg from "./assets/player.png";

class MyGame extends Phaser.Scene {
    constructor () {
        super();
    }

    preload () {
        this.load.image("background1", bgImg1);

        // this.load.image("player", playerImg);
        this.load.spritesheet("player", playerImg, {
            frameWidth: 32,
            frameHeight: 36
        });
        // frameWidth: 32, frameHeight: 36이 캐릭터 하나의 크기이다.
        // frameWidth: 64로 지정하면 캐릭터 2개가 화면에 load 된다.
    }

    create () {
        // ============== 배경 ==============
        this.backgroundimg = this.add.image(0, 0, 'background1'); // (x축, y축)
        // 아래와 같이 안할 경우 load 되는 이미지의 중심점으로 잡아 1/4 크기가 된다.
        this.backgroundimg.setOrigin(0, 0);

        // ============== 캐릭터 ==============
        // this.load.image에서 this.load.spritesheet로 변경
        this.lion = this.add.sprite(config.width / 2, config.height / 2, 'player');

        // this.lion = this.add.image(config.width / 2, config.height / 2, 'player');
        // this.lion.setOrigin(0, 0); 캐릭터를 정중앙에 위치시켜야하므로 주석처리

        // 크기 1.5배로
        this.lion.scale = 1.5;

        // x축 방향 뒤집기
        // this.lion.flipX = true;

        // y축 방향 뒤집기
        // this.lion.flipY = true;

        // 기울기(이걸 update function에 두면 부드럽게 캐릭터 방향 전환 가능)
        // this.lion.angle += 10;

        // ============== 캐릭터 움직이기(애니메이션 만들기) ==============
        // 이동
        this.anims.create({
            key: "lion_anim",
            frames: this.anims.generateFrameNumbers('player'), // 'player'이미지를 frame으로 사용하겠다.
            frameRate: 12, // 1초당 12프레임
            repeat: -1 // 몇 번 반복할것이냐(-1 = 무한)
        });

        // 정지
        this.anims.create({
            key: "lion_idle",
            frames: this.anims.generateFrameNumbers('player', {
                start: 0,
                end: 0
            }),
            frameRate: 1,
            repeat: 0
        });

        // 캐릭터 움직이기
        // this.lion.play('lion_anim');

        // 캐릭터 멈추기
        // this.lion.play('lion_idle');

        // this.input.keyboard.createCursorKeys() : 입력된 key에 대한 정보를 알 수 있다.
        this.keyboardInput = this.input.keyboard.createCursorKeys();
        this.lion.moving = false;
        // ============== 안내문구 ==============
        this.add.text(20, 20, "'위니브 월드 : 새로운 시대'에 오신 것을 환영합니다.", {
            font: '25px 배달의민족 주아 TTF',
            fill: '#f5e99f' // 16진수나 컬러이름
        });
    }

    update() { // 화면이 update 될 때마다 실행
        // console.log('update');
        this.move(this.lion); // 함수 이름은 마음대로
    }

    move(lion) {
        const PLAYER_SPEED = 3;

        if (this.keyboardInput.left.isDown || this.keyboardInput.right.isDown || this.keyboardInput.up.isDown || this.keyboardInput.down.isDown) {
            // 방향키를 누르면 이동
            if(!lion.moving) lion.play('lion_anim');
            lion.moving = true;
        } else {
            // 방향키를 떼면 멈춤
            if(lion.moving) lion.play('lion_idle');
            lion.moving = false;
        }

        if (this.keyboardInput.left.isDown) {
            lion.x -= PLAYER_SPEED;
            lion.flipX = false; // x축은 방향 전환도 해줘야함
        } else if (this.keyboardInput.right.isDown) {
            lion.x += PLAYER_SPEED;
            lion.flipX = true; // x축은 방향 전환도 해줘야함
        }
        if (this.keyboardInput.up.isDown) {
            lion.y -= PLAYER_SPEED;
        } else if (this.keyboardInput.down.isDown) {
            lion.y += PLAYER_SPEED;
        }
    }
}

const config = {
    type: Phaser.AUTO,
    parent: 'phaser-example',
    width: 800,
    height: 600,
    backgroundColor: 0x000000,
    physics: {
        default: 'arcade',
        arcade: {
            debug: process.env.DEBUG === "true" // debug 옵션 = true
        }
    },
    scene: MyGame
};

const game = new Phaser.Game(config);
배달의민족 폰트 주아체 다운로드
배달의민족 주아체 다운로드 배달의민족 주아체는 붓으로 직접 그려서 만든 손글씨 간판을 모티브로 만들었습니다. 붓으로 그려 획의 굵기가 일정하지 않고 동글동글한 느낌을 주는 서체로 옛
font.woowahan.com
'흥미 > phaser' 카테고리의 다른 글
| #10 Scene 만들기1 (0) | 2023.05.12 |
|---|---|
| #9 템플릿 다운 (0) | 2023.05.07 |
| #7 hello world (0) | 2023.05.02 |
| #6 개발환경 설정 (0) | 2023.05.01 |
| #5 phaser? (0) | 2023.05.01 |
- Total
- Today
- Yesterday
- Spring Boot
- OS
- MongoDB
- 코테
- Phaser
- SQL
- 자료구조
- java
- Java8
- 메모리
- 운영체제
- DART
- 알고리즘
- SpringBoot
- Phaser3
- db
- spring
- Advanced Stream
- API
- node.js
- jpa
- Stream
- 빅데이터 분석기사
- 빅데이터
- 프로그래머스
- 프로세스
- 코딩테스트
- nosql
- MySQL
- git
| 일 | 월 | 화 | 수 | 목 | 금 | 토 |
|---|---|---|---|---|---|---|
| 1 | 2 | 3 | 4 | 5 | 6 | 7 |
| 8 | 9 | 10 | 11 | 12 | 13 | 14 |
| 15 | 16 | 17 | 18 | 19 | 20 | 21 |
| 22 | 23 | 24 | 25 | 26 | 27 | 28 |
